How to Make a Slow-Stitched Bookmark or Keyring: A Step-by-Step Guide
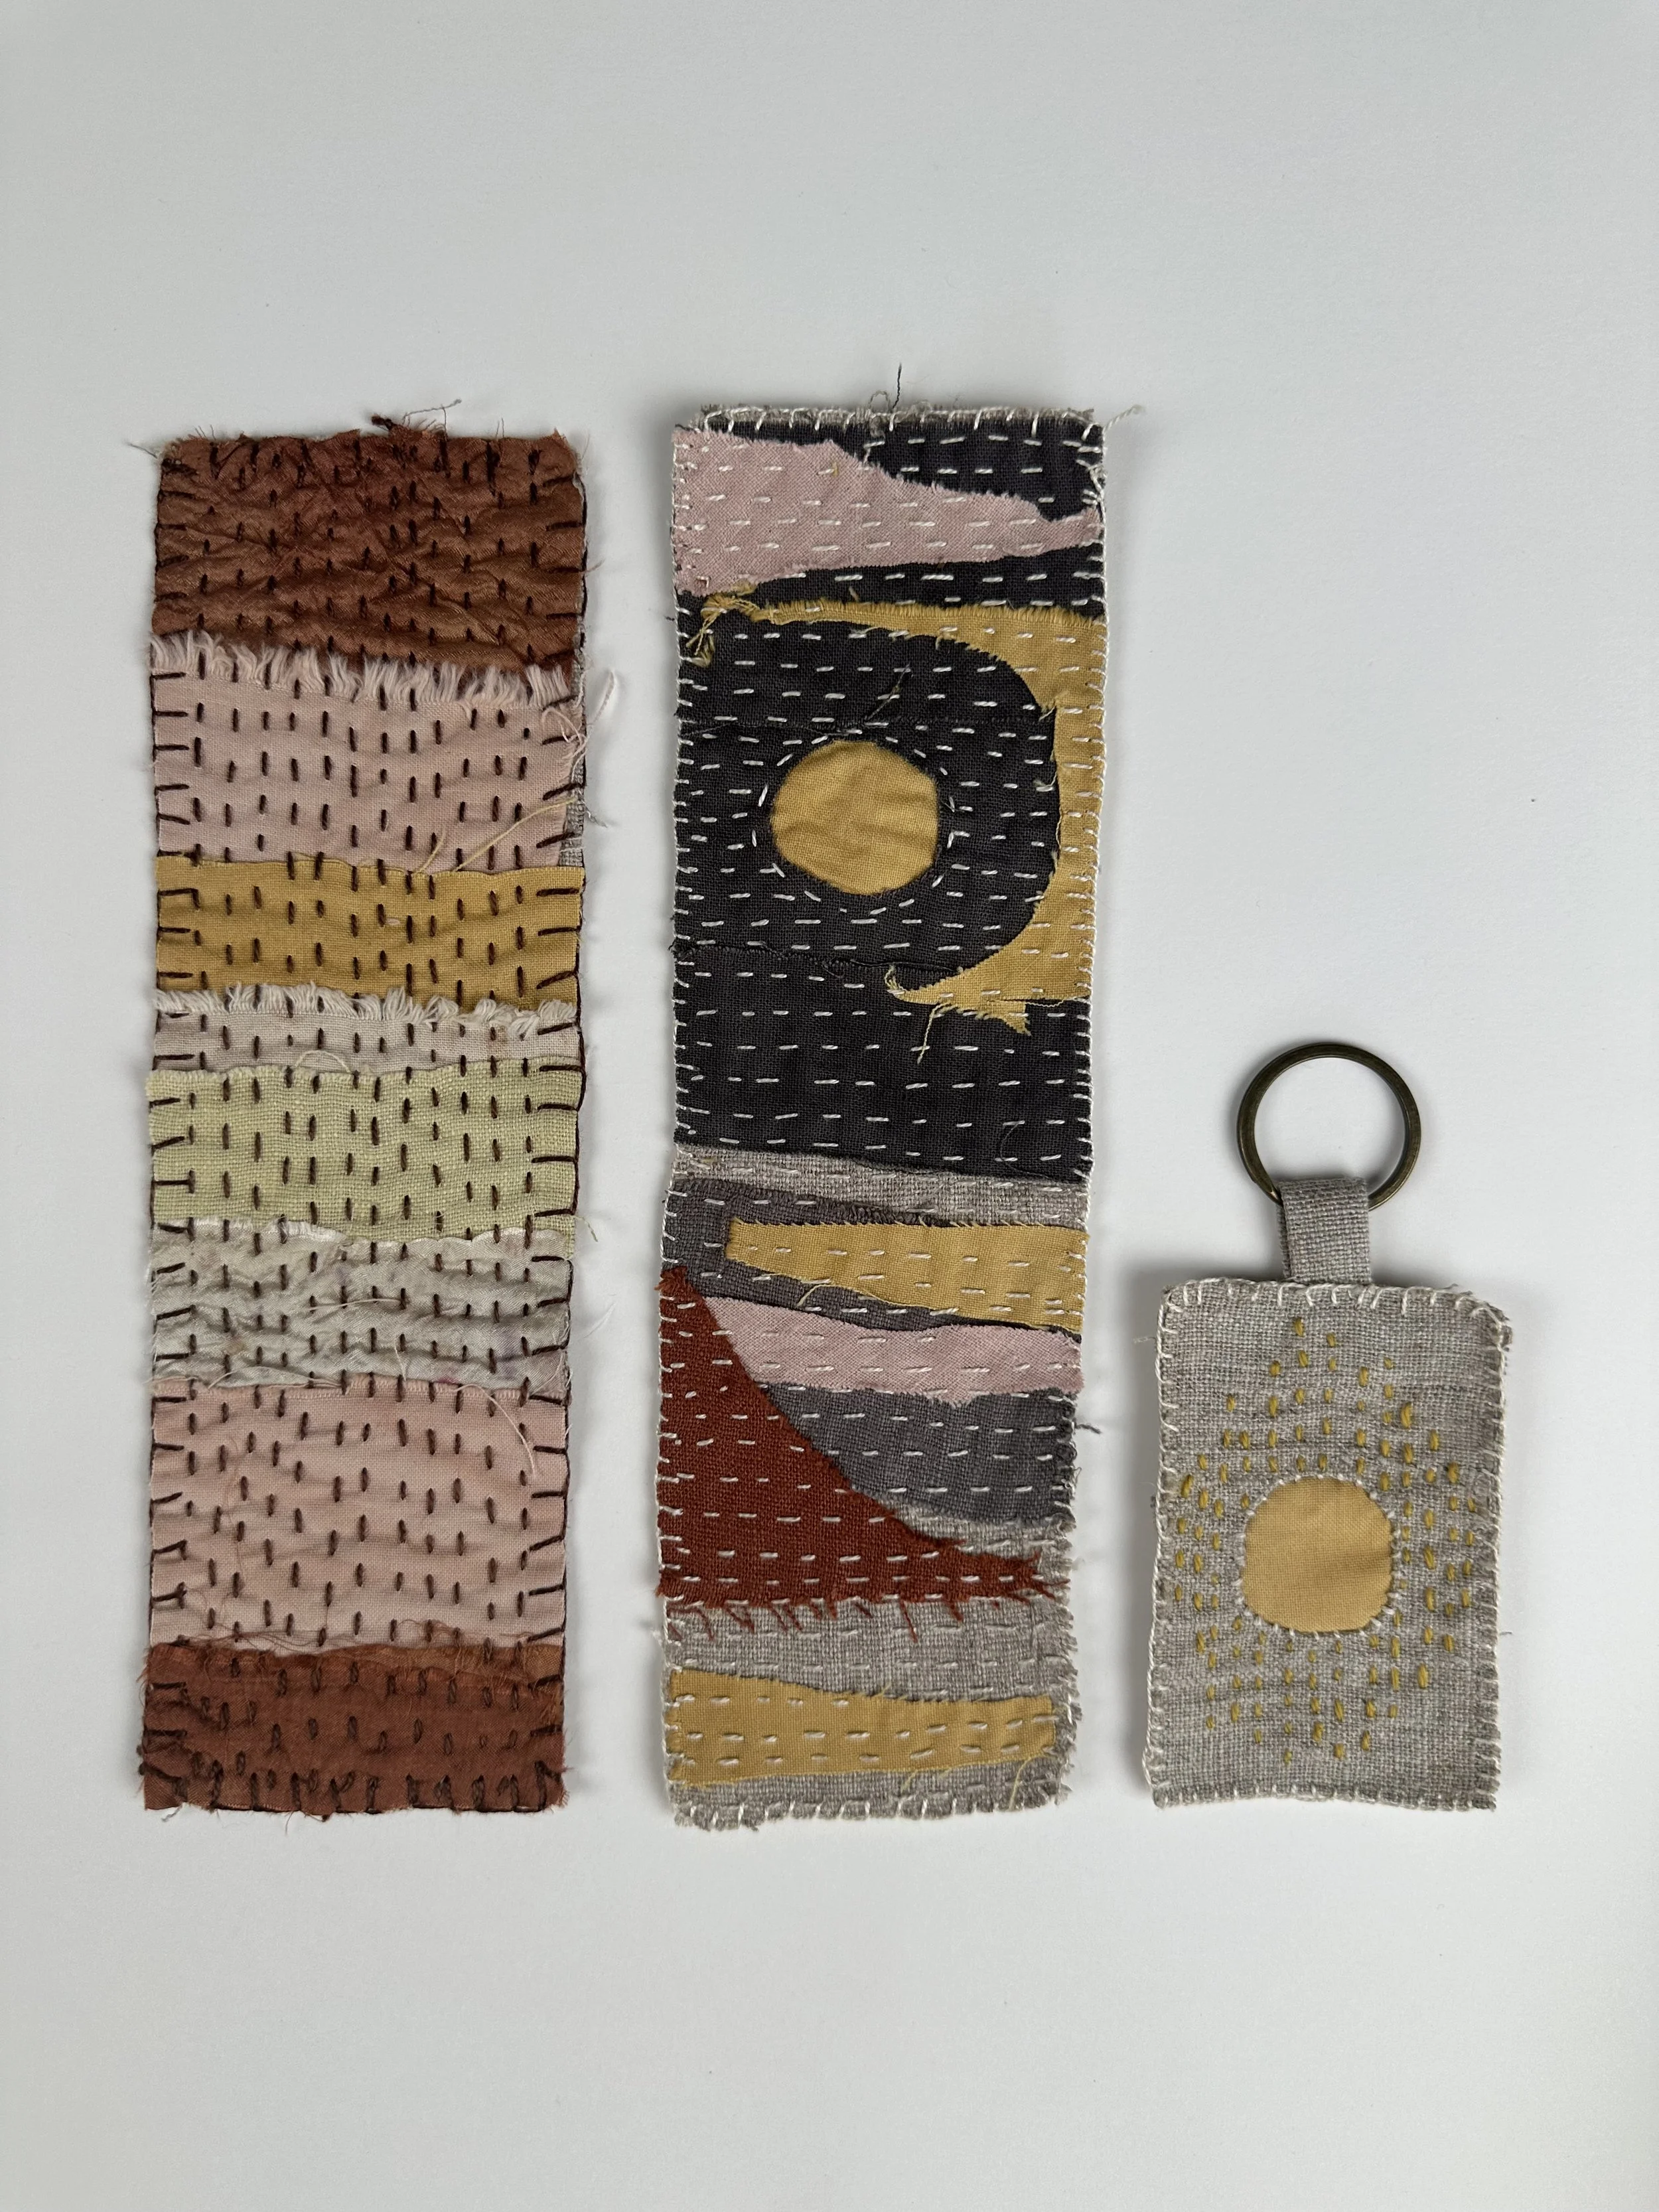
This lovely project is a perfect way to use up your smaller scrap fabrics and create functional textiles that make ideal gifts. Recently, I've rekindled my love for reading and needed something to stop me from folding book pages or using a hairpin as a bookmark. Inspired by the Japanese mending technique of boro, where fabrics are layered over one another and attached with running stitch, I created a very strong and sturdy fabric. I've kept the edges raw and finished with a blanket stitch, making this a truly handmade item with no attempt to disguise that! The possibilities with this technique are endless. You can keep it simple by laying your fabrics in stripes as I did with my first attempt, or you can incorporate different shapes. I used an earthy palette of plant-dyed silks, cottons, and linens. Depending on what you have at hand, you can play with different colour arrangements, try creating a gradient, or mix and match patterns with solids.
A Brief History of Boro Stitching
Boro stitching originates from Japan and is traditionally used for repairing worn clothing and household textiles. The term "boro" means "tattered" or "repaired," reflecting the technique's utilitarian origins. Farmers and peasants used this method to extend the life of their garments, creating unique, patchwork textiles. Today, boro has evolved into an art form, celebrated for its beauty and sustainability.
Materials Needed
To make a bookmark or keyring, you will need:
A sturdy base fabric (I used a heavyweight linen)
A selection of scrap fabrics
Strong thread such as sashiko or perle cotton 8 or 5
Fabric scissors
A sashiko needle
Pins
A ring (if you intend to make a keyring)
Tips for Choosing Fabrics
When selecting fabrics for your project, consider mixing different textures and weights to add interest. Lightweight cottons and linens work well together, while silks can add a touch of luxury. Using fabrics with sentimental value, such as pieces from old clothing, can make your bookmark or keyring even more special.
Getting Started
Cut Your Backing Fabric
For the bookmark, my fabric was approximately 7 x 23 cm (2 2/3 x 9 inches). For a keyring, I used a piece 6 x 17 cm (2 1/4 x 6 3/4 inches). For the keyring, you will also need an additional piece of fabric for the loop; mine was 3 x 8 cm (1 1/4 x 3 1/8 inches). I folded the edges lengthways to make a thin strip 1.5 cm wide and then ironed it. Fold in half again.
Arrange Your Fabrics
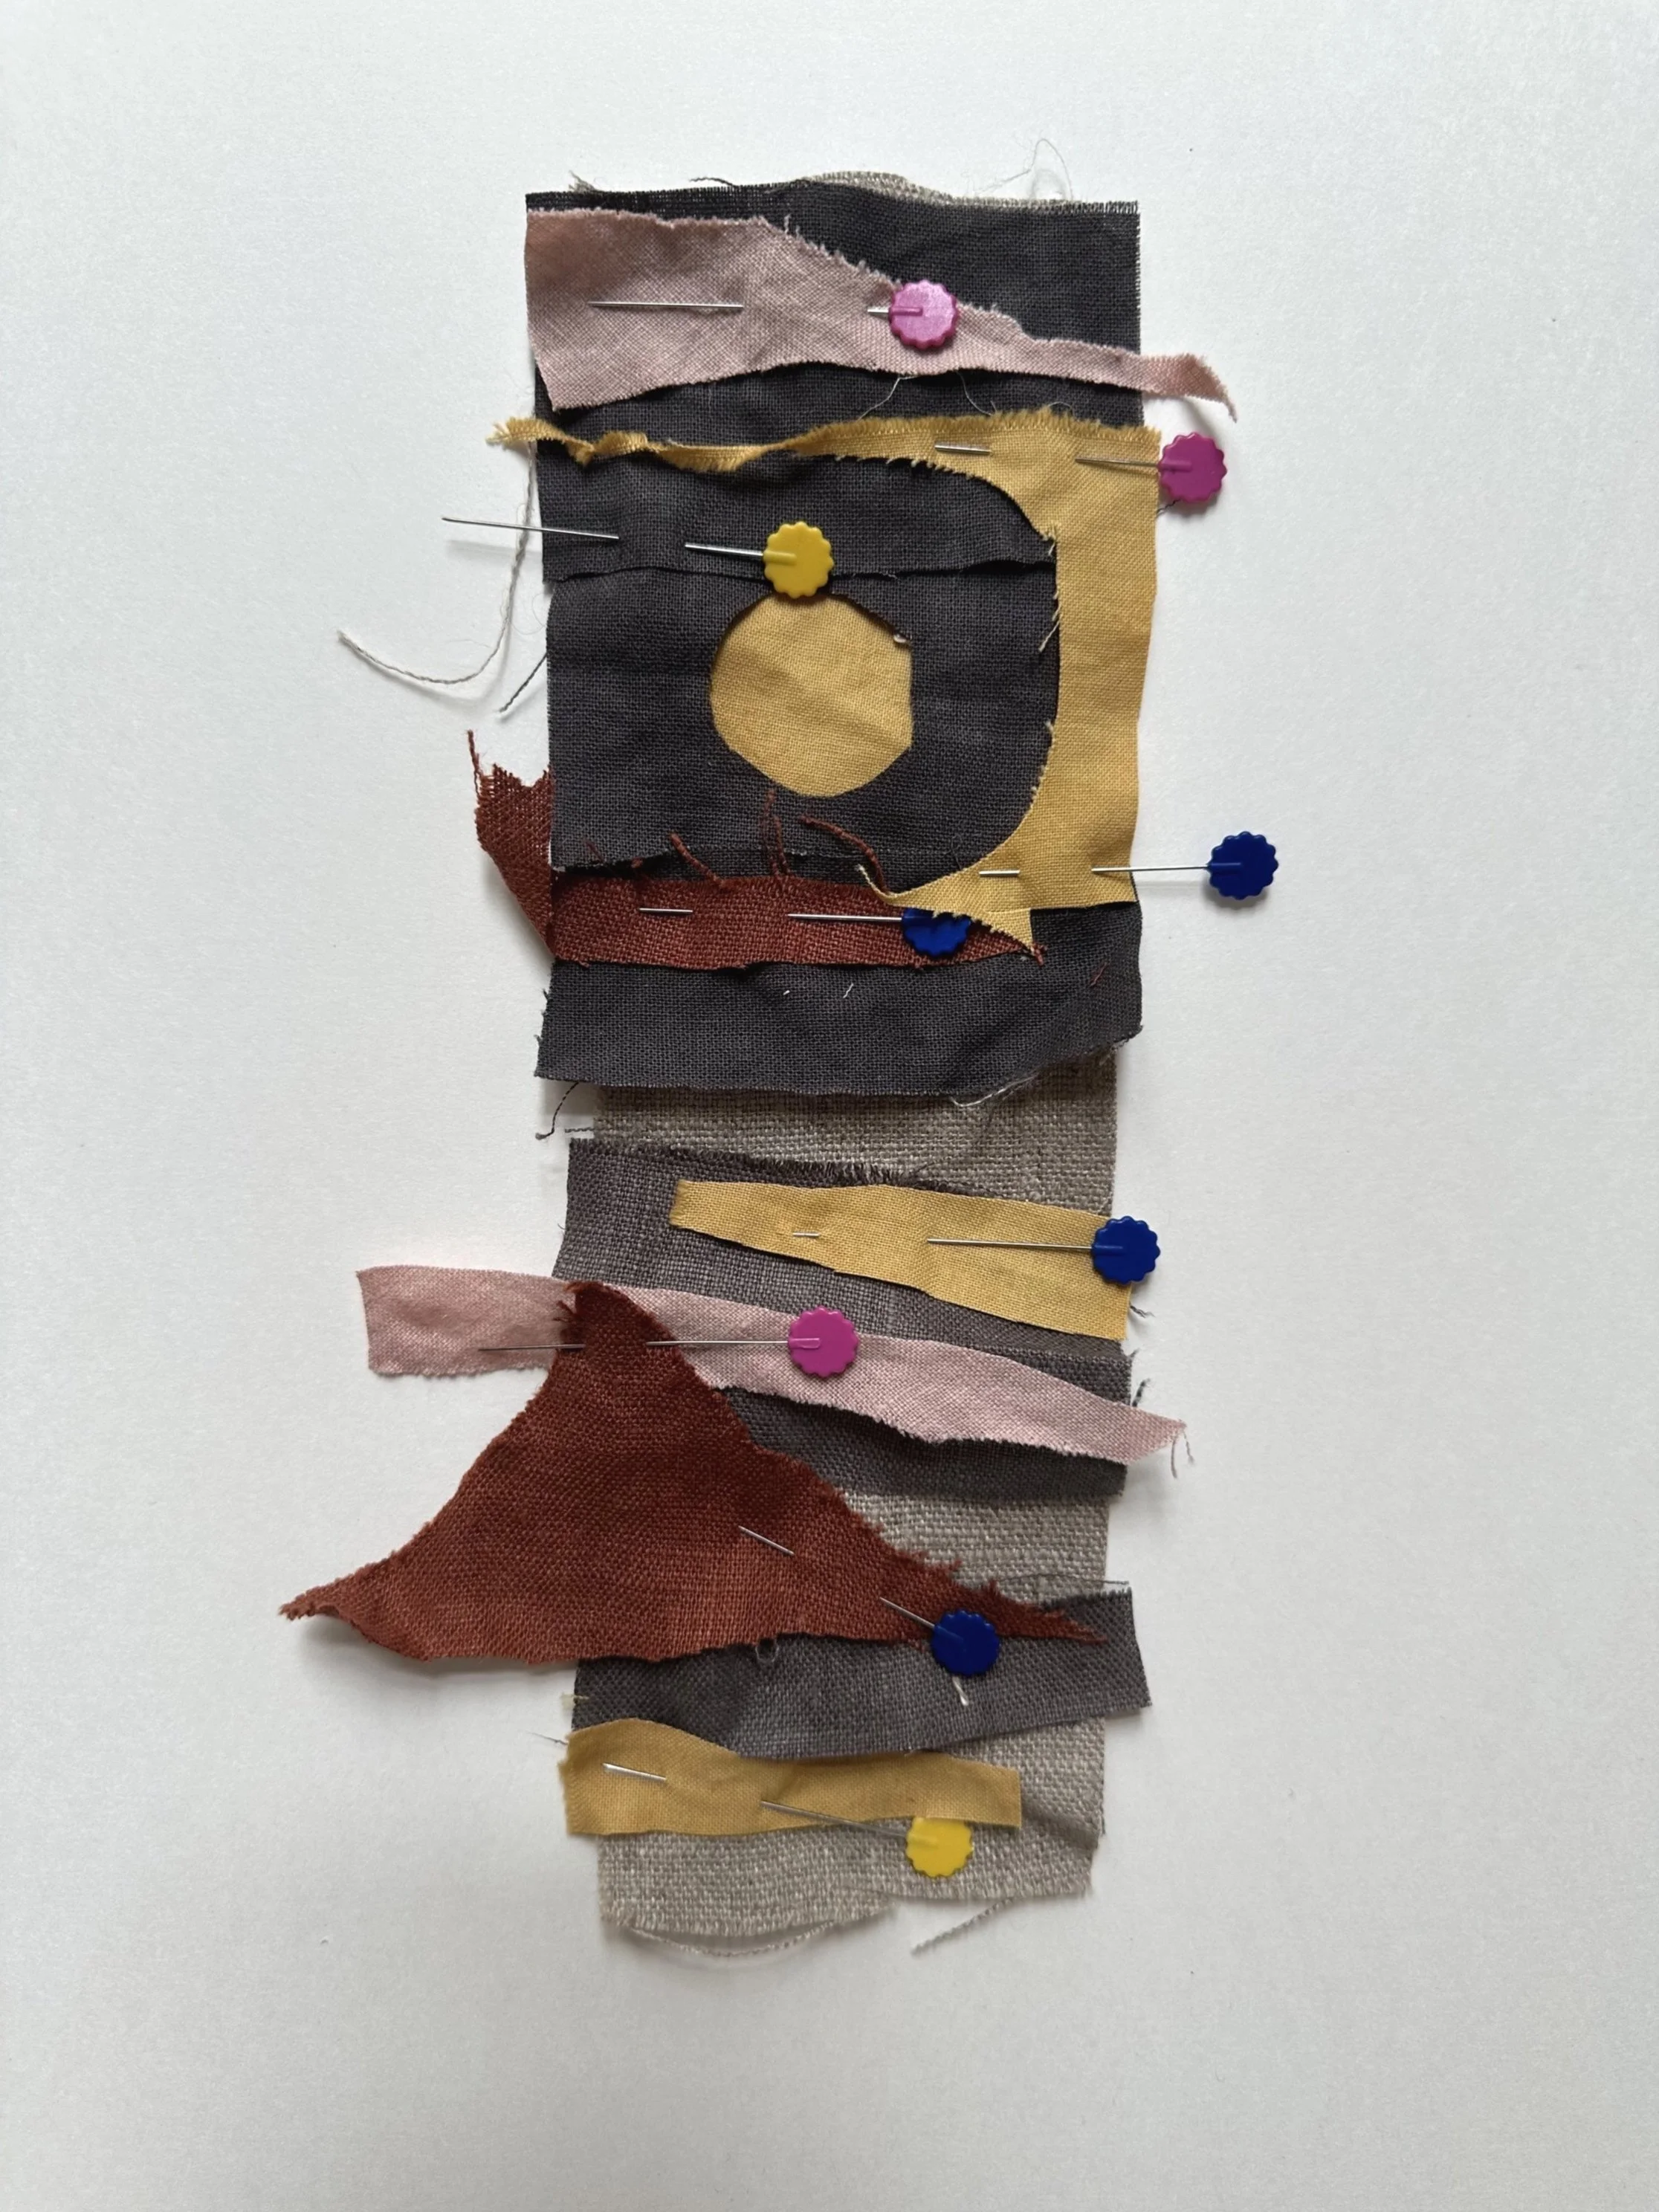
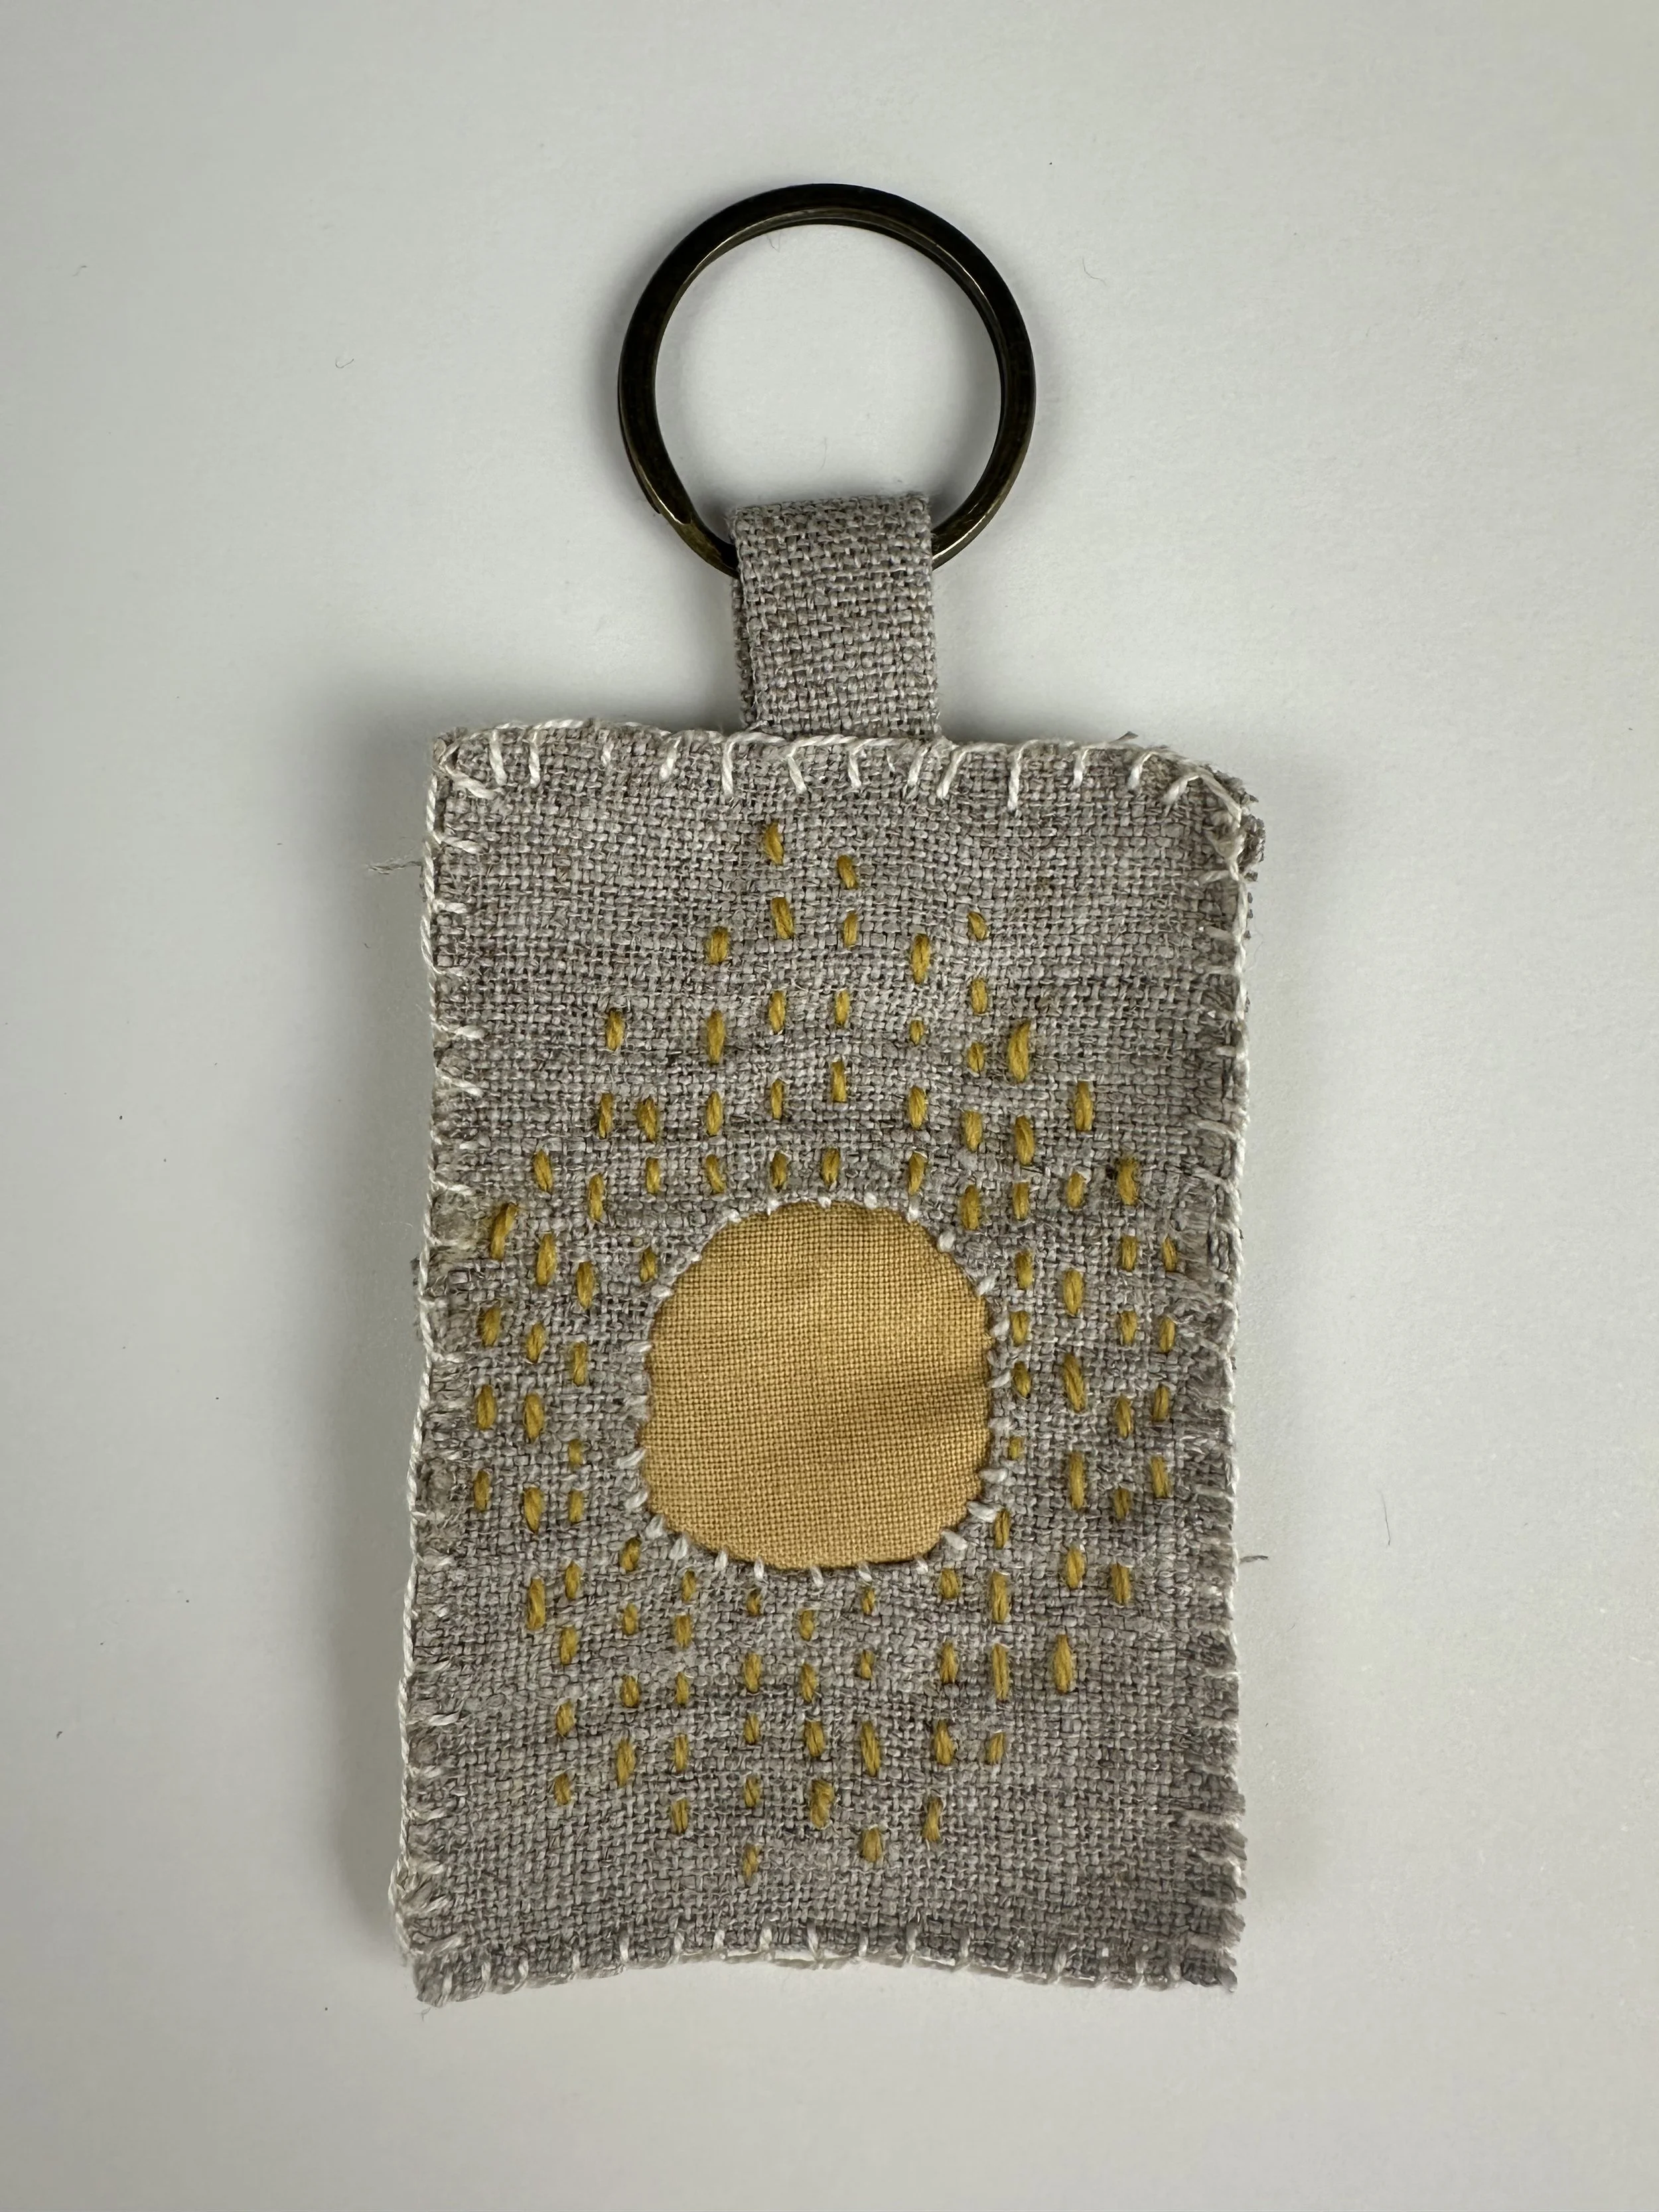
Lay your fabrics over your backing fabric. You'll want to overlap them slightly unless you would like the backing fabric to feature as part of your design. Pin them down. For my keyring, I cut a hole and reverse appliqued it by folding the raw edges under, placing a coloured fabric beneath it, and whip stitching it down.
Adding Running Stitch
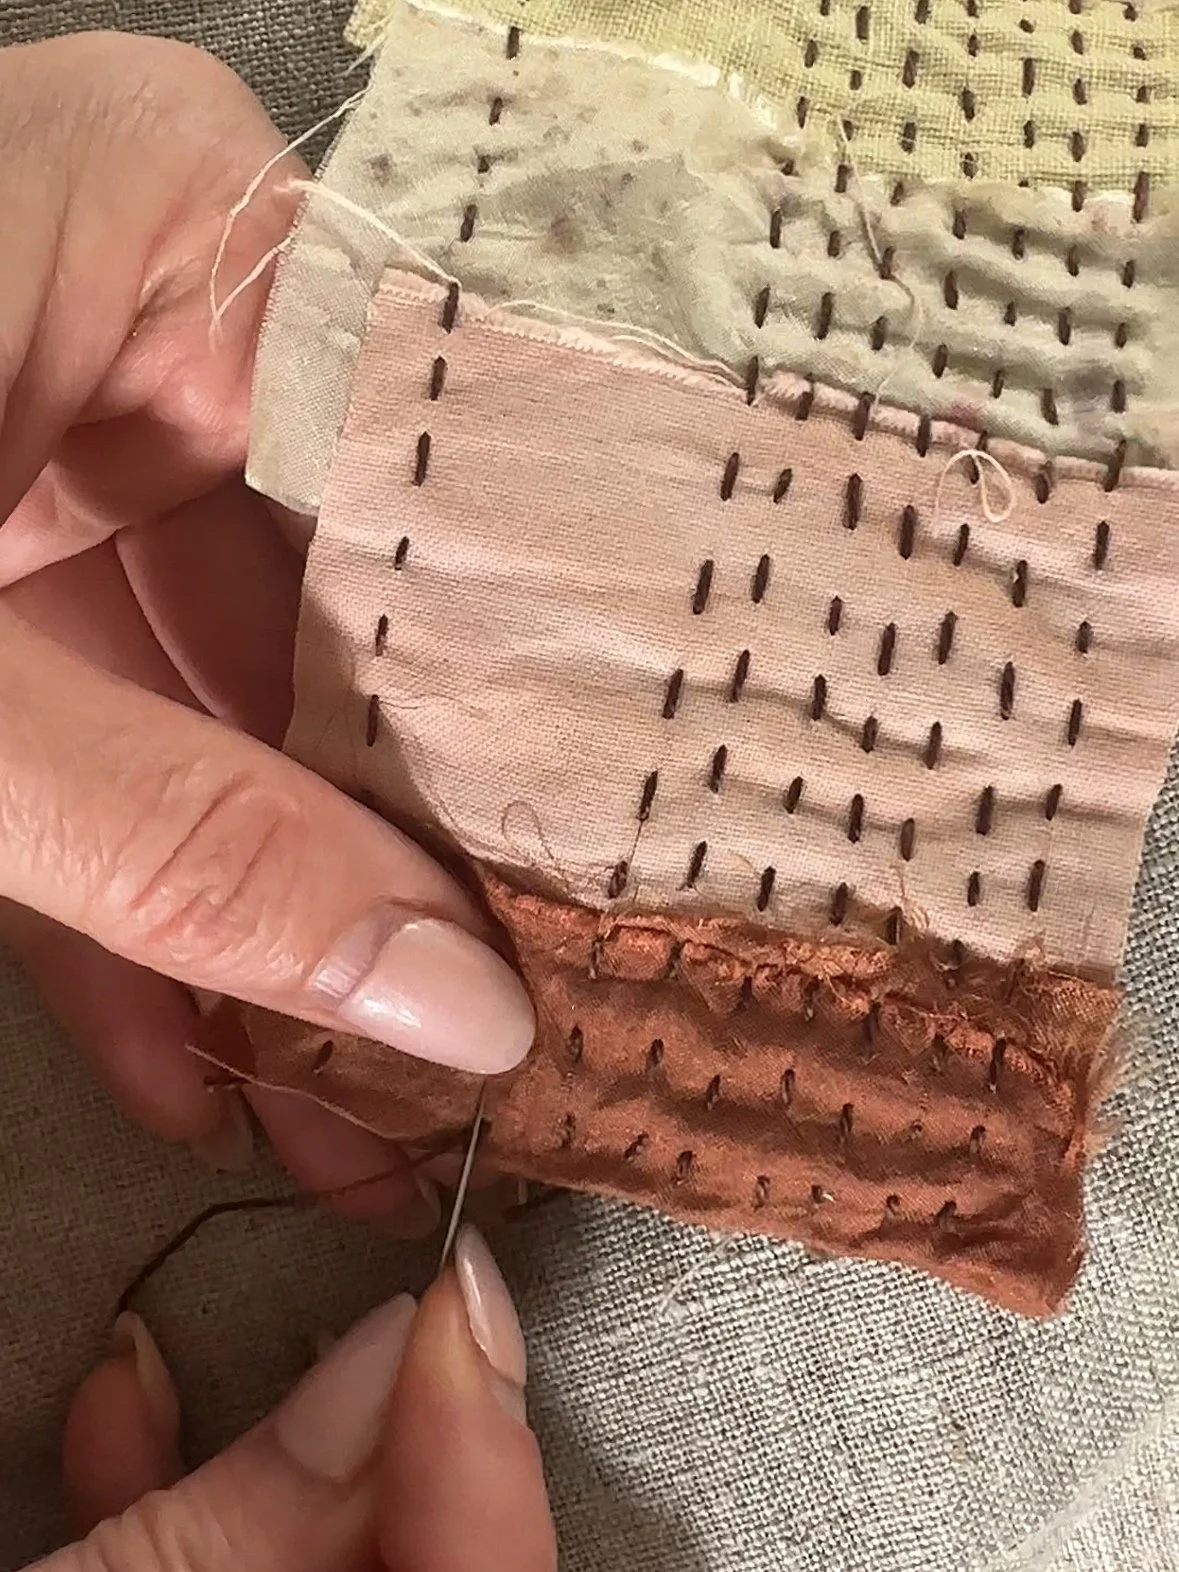
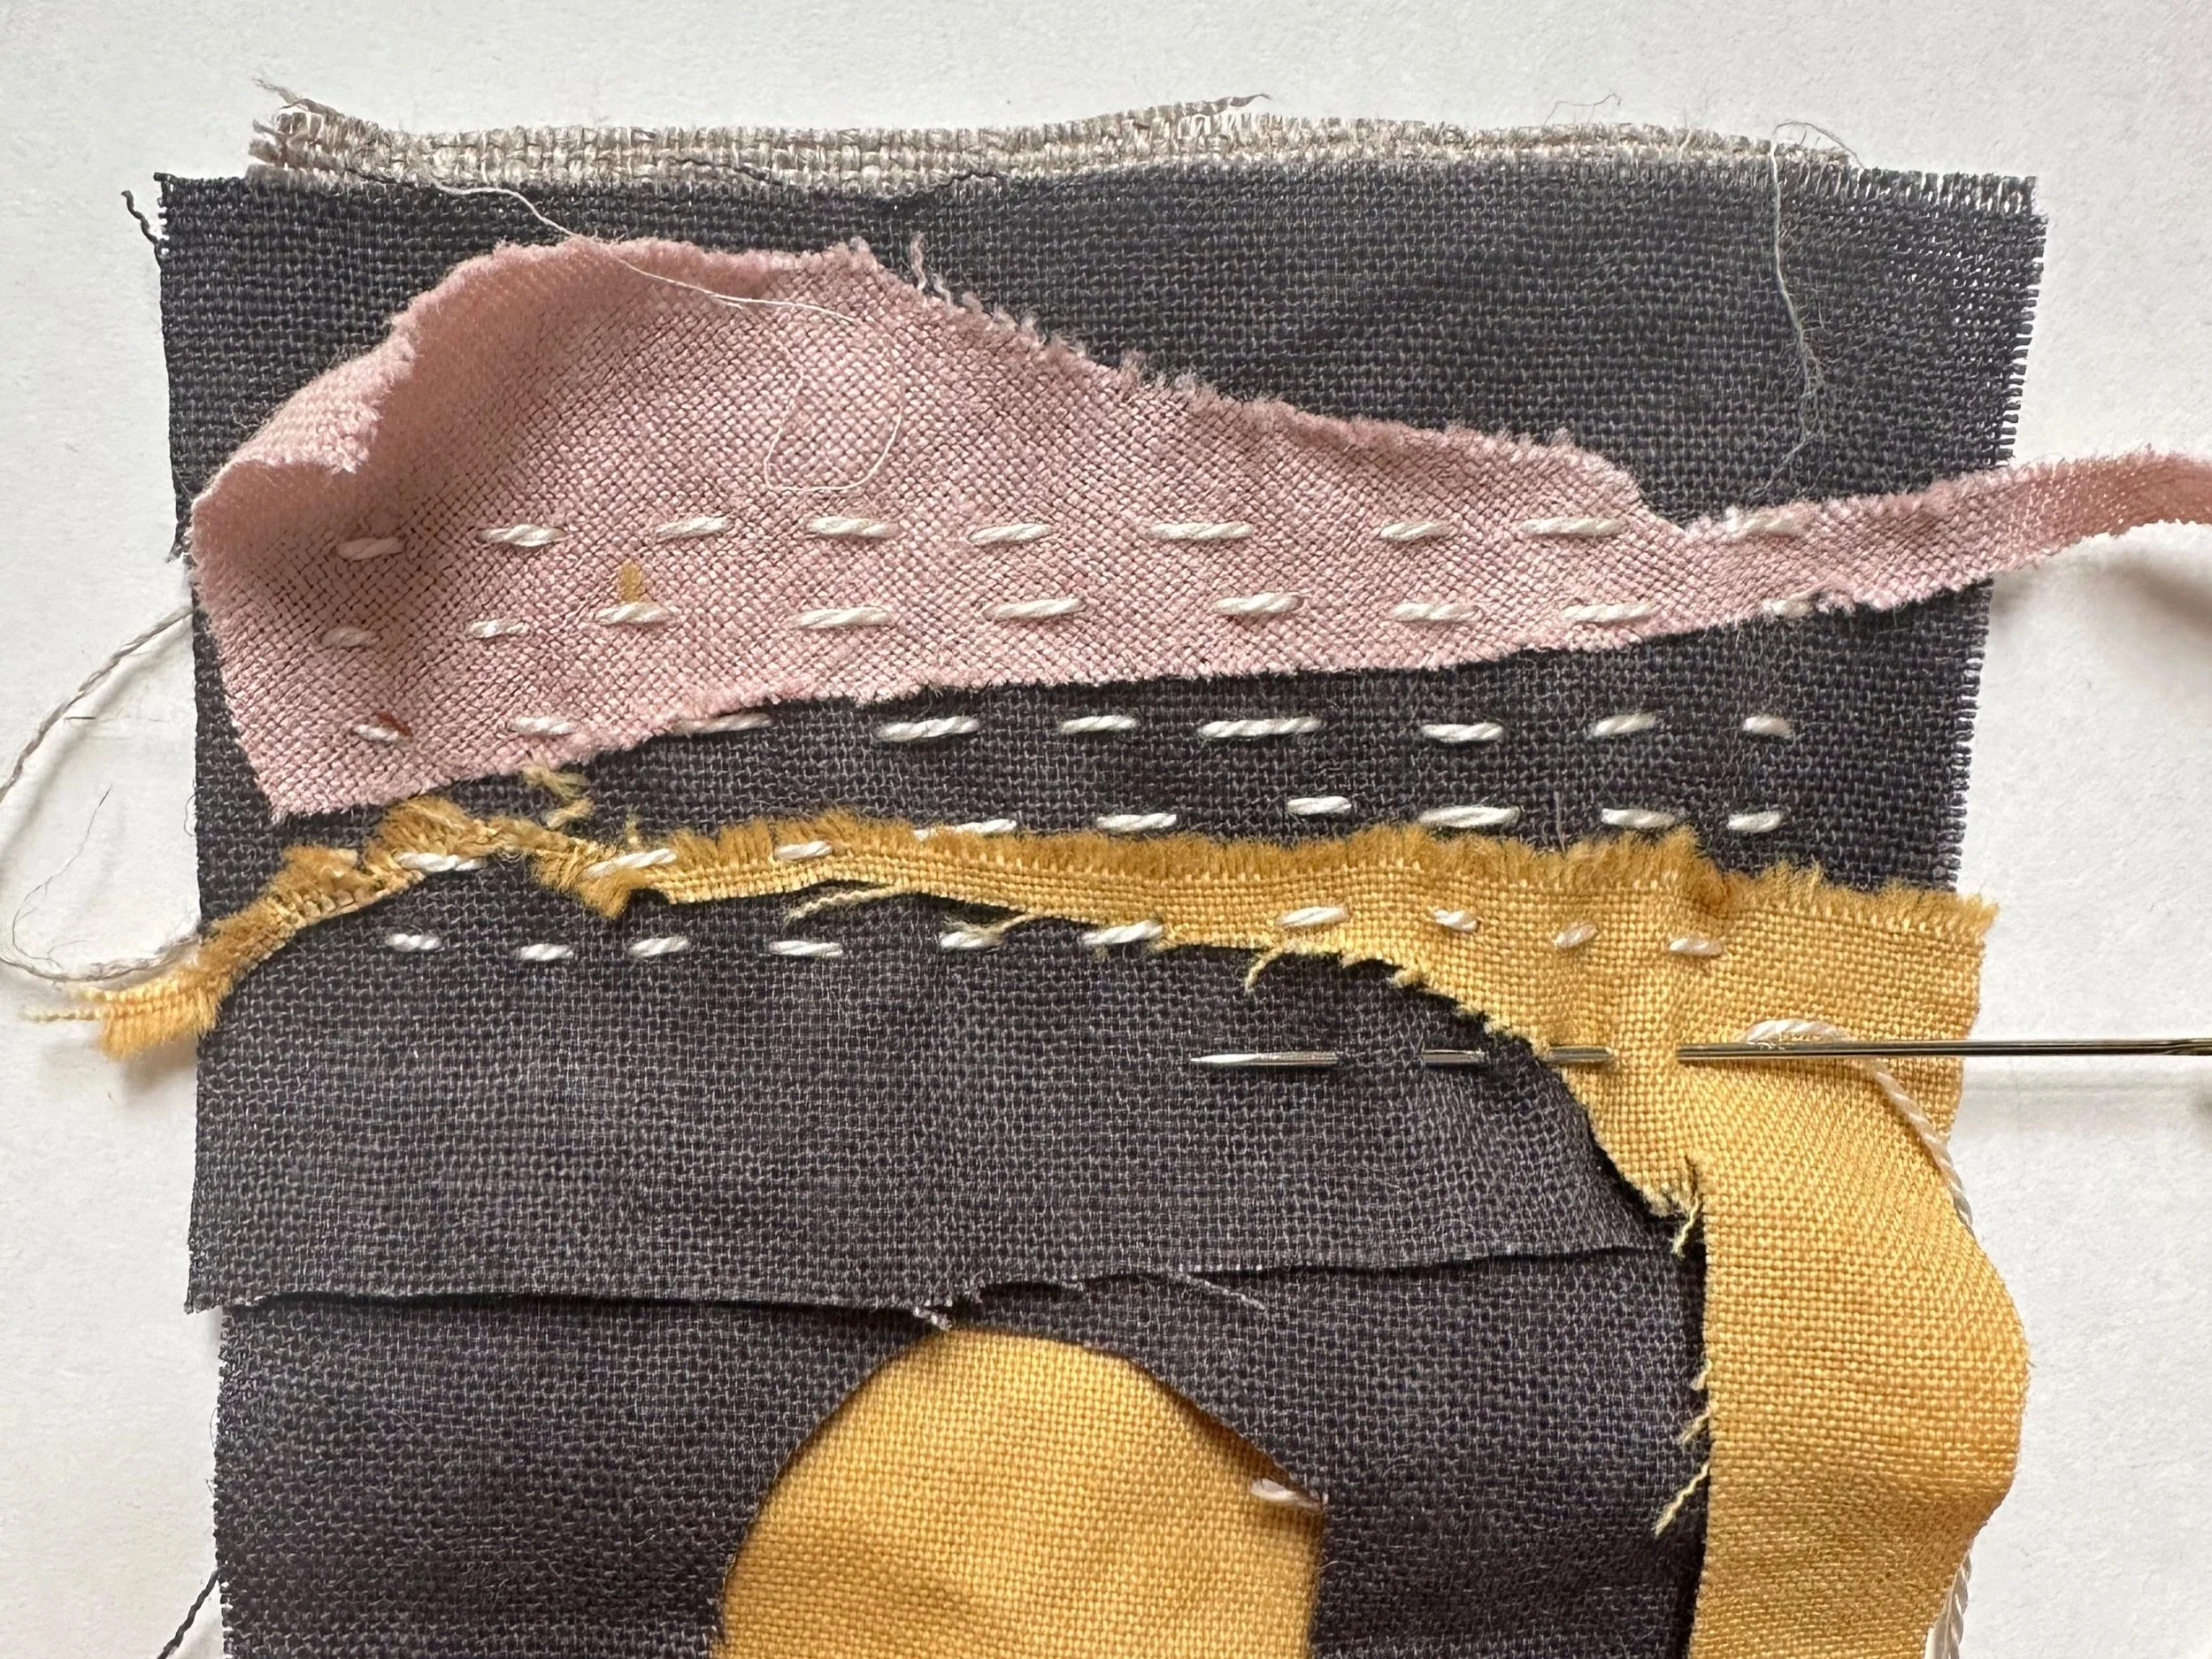
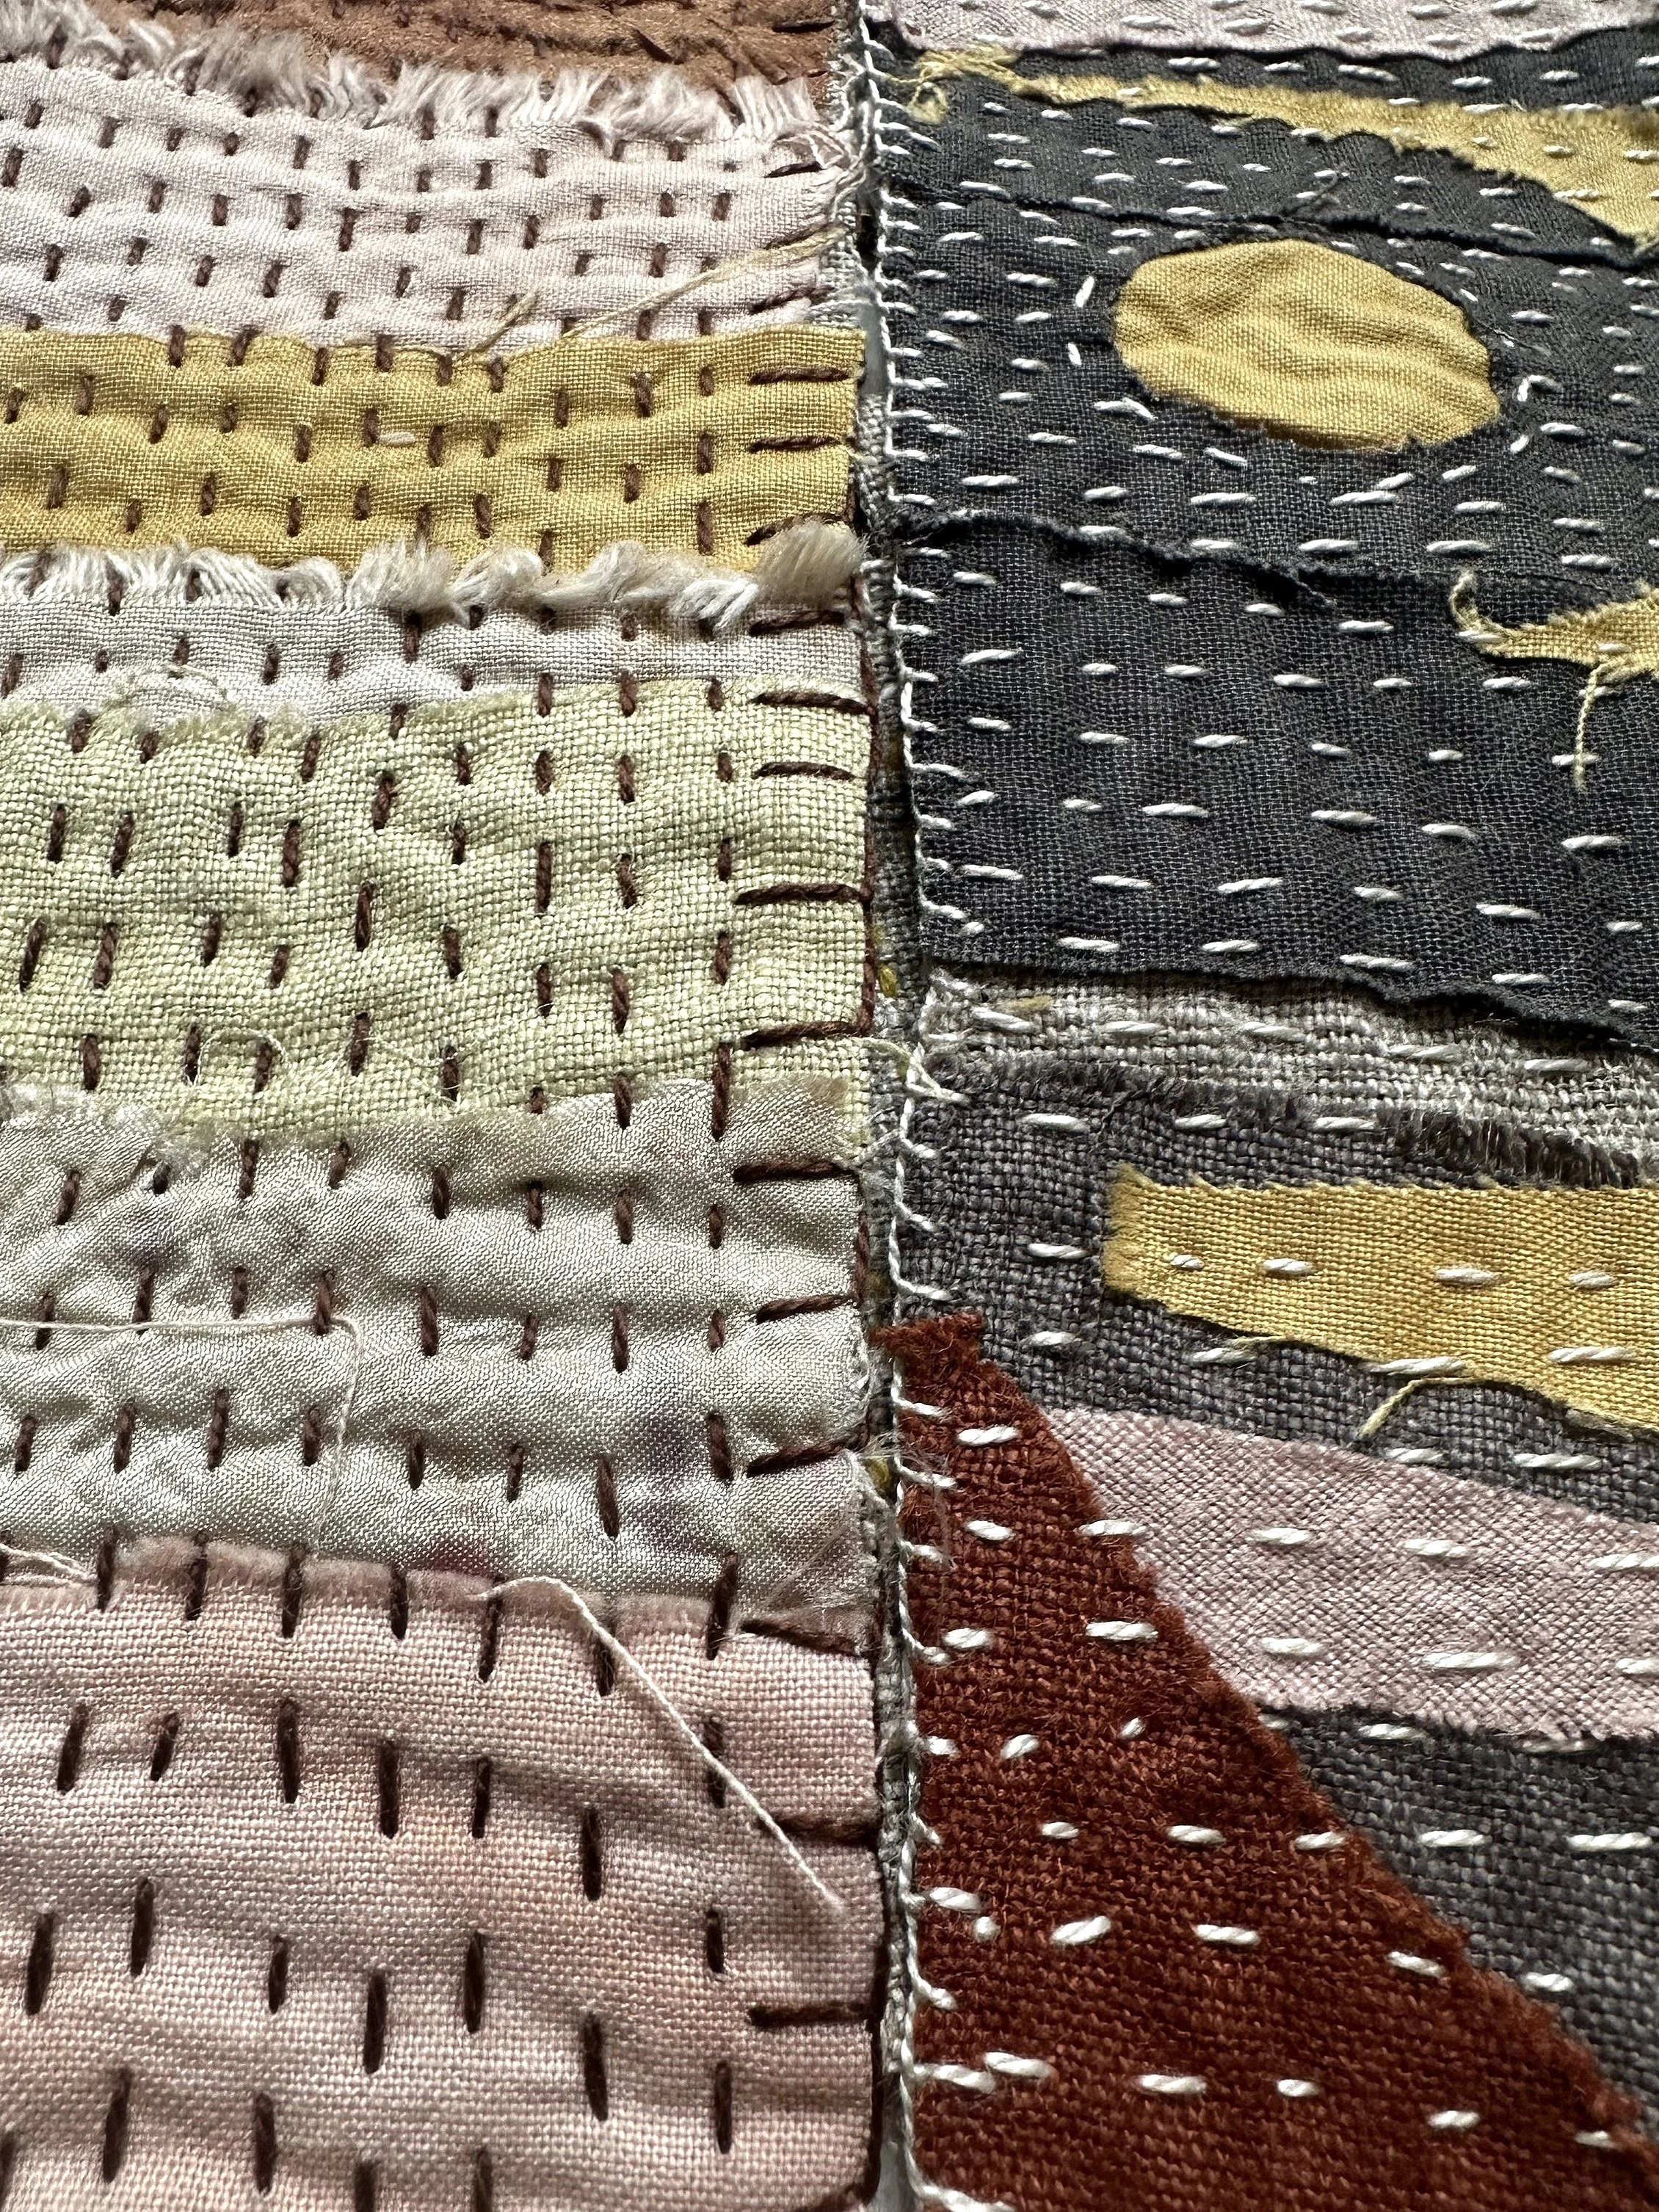
Thread and knot the end of an arm's length piece of thread. I have chosen to keep my knots visible. I began by sewing a straight line of running stitch through the middle of the bookmark to secure the fabrics down and knotted at the end. I then did the same on both sides to make three lines of stitching. Next, I decided on how much space I wanted to leave between each row of stitches (approximately 4-5 mm) and continued to sew a running stitch up and down the length of the fabric. As I changed direction, I made sure that the horizontal stitch was at the back so that all the stitches face the same direction at the front. My approach to slow stitch is to not be too concerned with the length and space between each stitch, preferring instead to get lost in the process. Eventually, my hands find a rhythm, and I like to embrace the wonkiness of my stitches! You could, of course, take a different approach and stack and stagger your stitches in a more uniform manner.
Tidying Your Edges
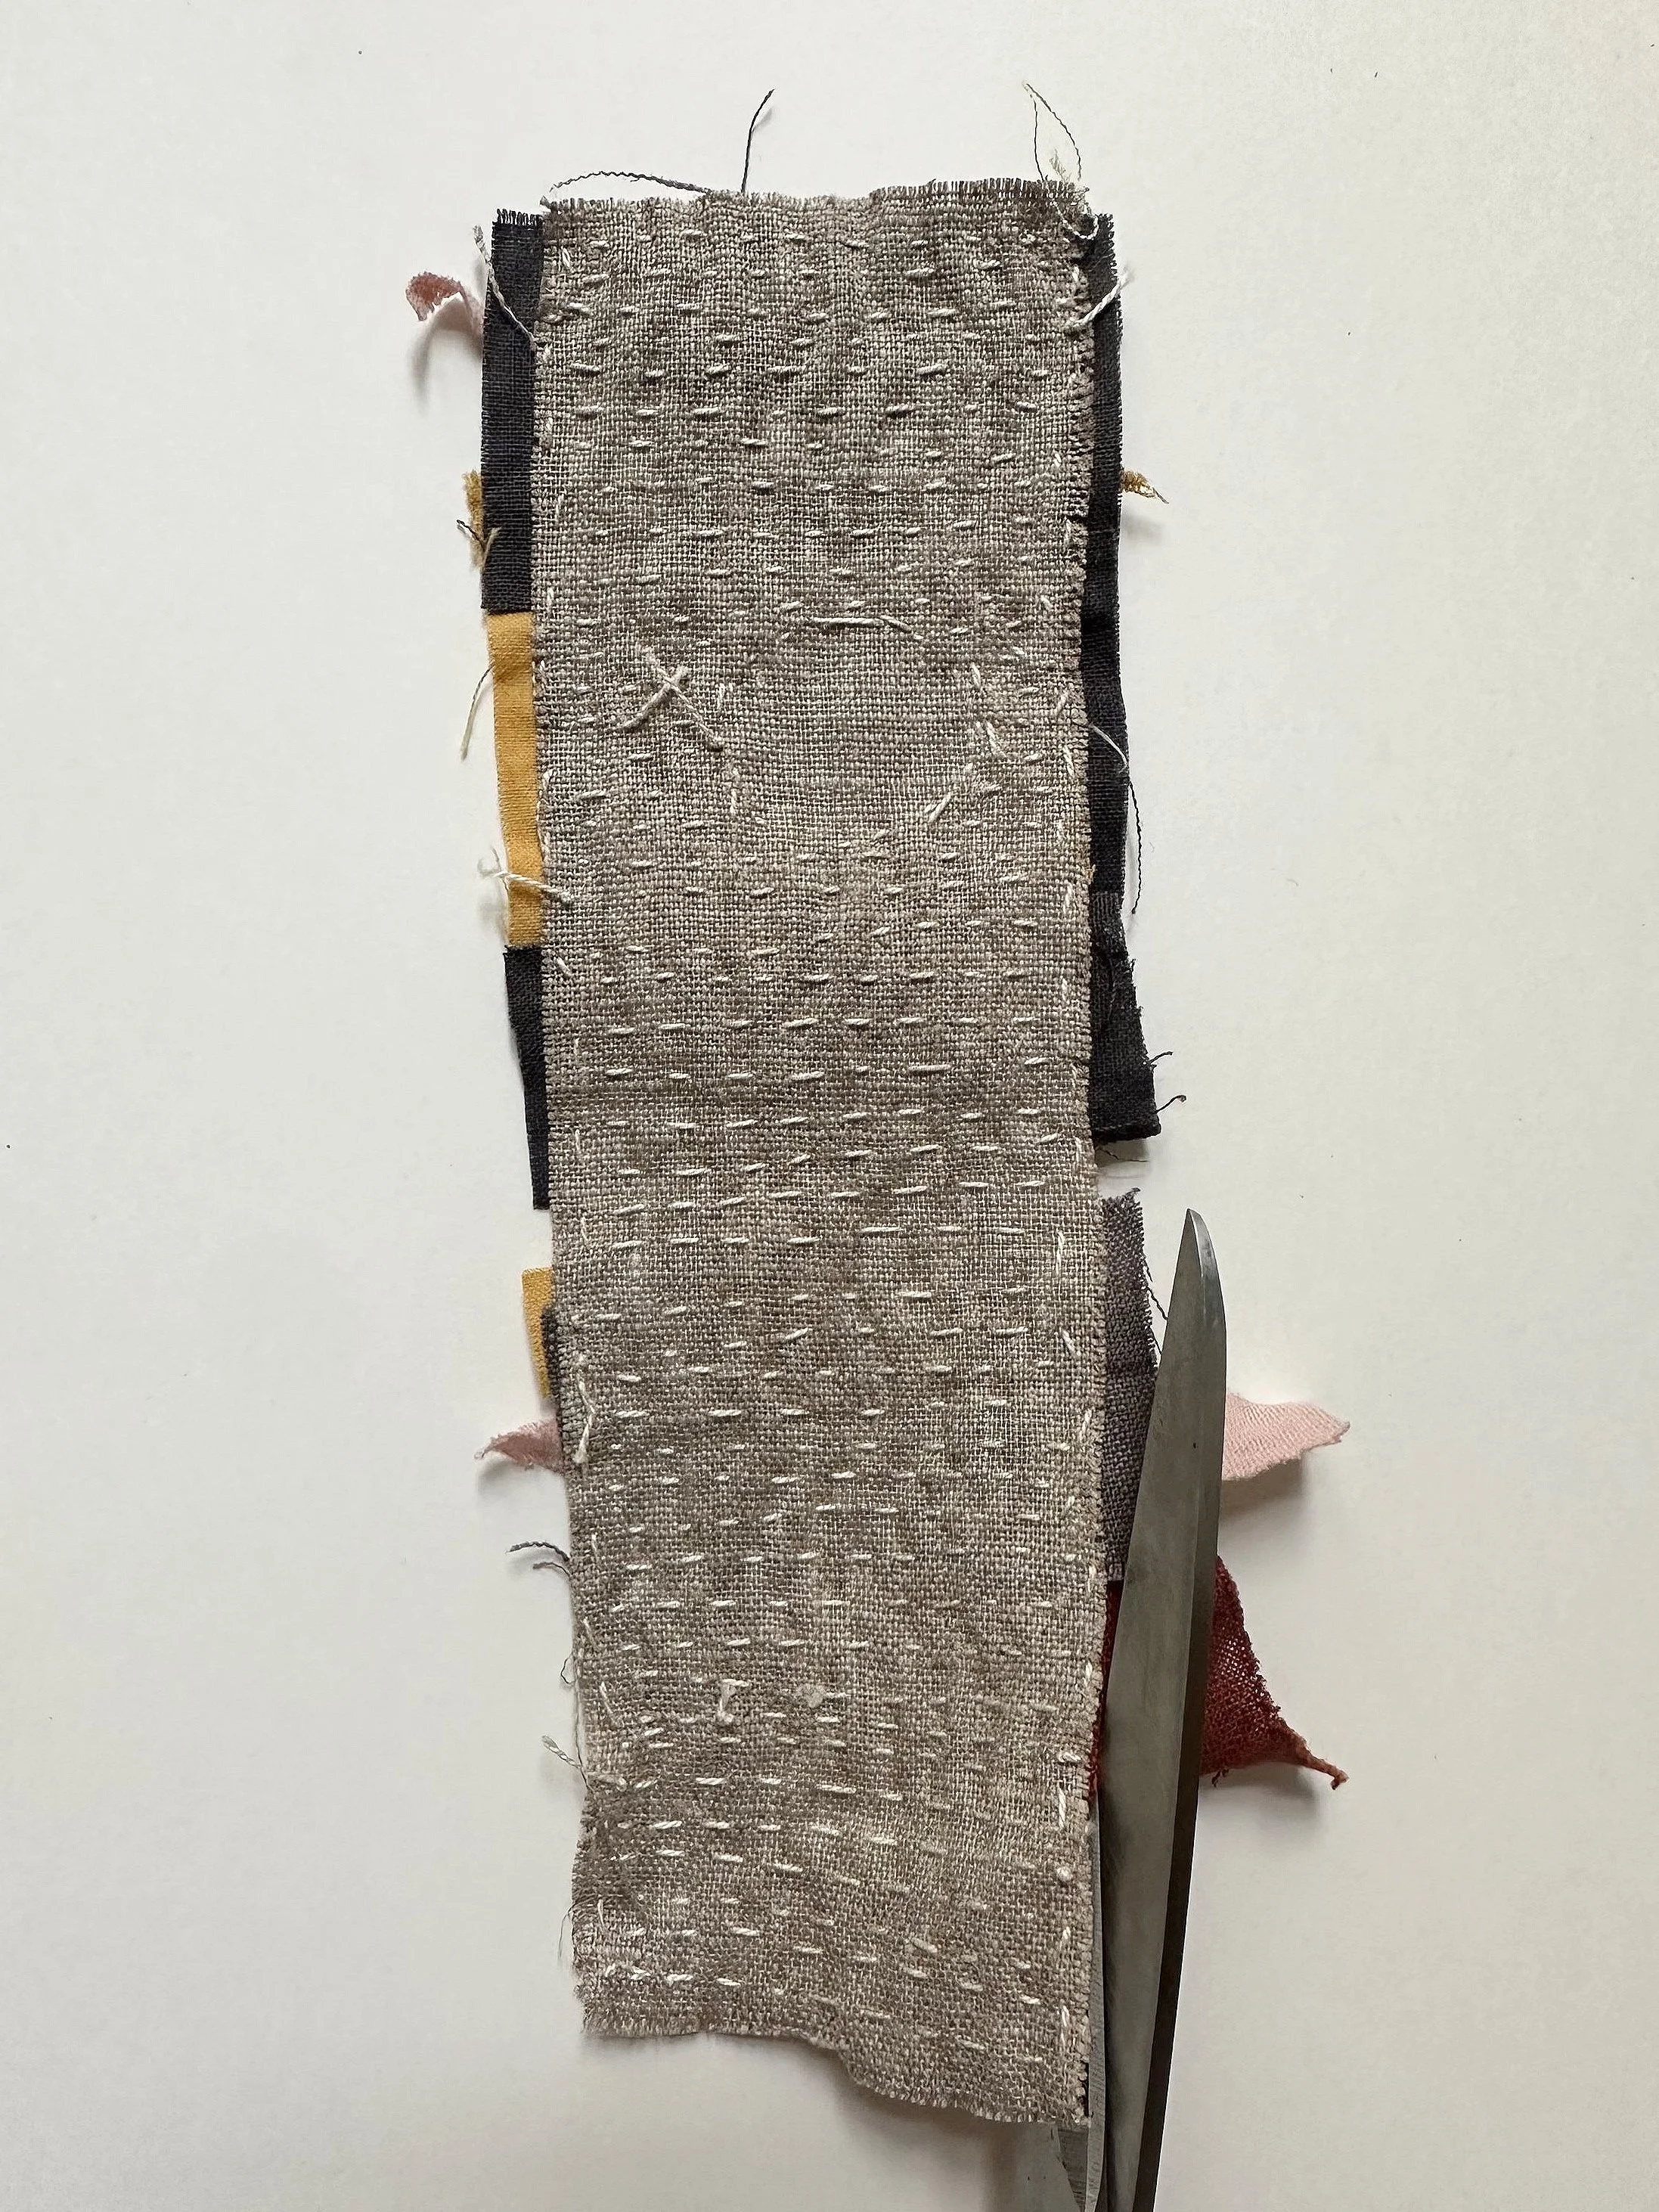
Before adding blanket stitch, I trimmed the edges. Turn the bookmark face down and trim any overlapping scraps, taking care not to cut through any of the stitches you have just made.
Finishing Your work
Blanket Stitch
You will need to finish the edges to prevent any further unravelling. I chose a blanket stitch, but a whipped stitch would also look lovely. In the first bookmark, the stitches were intentionally large; in the second, they are smaller and closer together. Choose a style that works for your design.
Assembling the Keyring
For a keyring, fold over your fabric to make a smaller rectangle and pin the folded loop with the keyring threaded through to the centre top. Secure the loop in place with some finer thread that matches your fabric before blanket stitching all around and under the loop at the front.
Common Mistakes and How to Avoid Them
Uneven Stitches: While the beauty of boro lies in its imperfection, try to maintain consistent stitch length and spacing for a more uniform look.
Unravelling Threads: Make sure you tie a knot at the end of your stitches to prevent them pulling apart. Always leave enough length at the end of sure stitches to tie at least a double knot.
Loose Fabric Layers: Ensure your fabric layers are securely pinned and stitched to prevent shifting. Try and position your stitches to catch the edge of the fabrics.
Fraying Edges: Some fraying should be embraced as part of the design however excessive fraying can compromise the durability of your piece. Always finish your edges to avoid this.
Additional Decoration Ideas
To add extra flair to your bookmark or keyring, consider incorporating some of these decoration ideas:
Embroidery: Add small embroidered motifs or initials for personalisation.
Beading: Sew small beads along your running stitches for a bit of sparkle.
Appliqué: Attach small shapes or symbols cut from contrasting fabrics.
Tassels: Make a tassel from threads or fabric strips and attach to one end.
Care Instructions
To keep your handmade bookmark or keyring in good condition, gently hand wash with mild soap and lay flat to dry. Avoid excessive friction or exposure to harsh elements, which can wear down the fabric and stitching.
Other Slow Stitch Project Ideas
I enjoyed sewing these so much. It’s not often I have an outcome in mind when I begin stitching as I am very much process driven. It was a fairly quick ‘slow-stitched’ project! I had loads of ideas for other items that could be made with this sturdy fabric; you could change the size and dimension of the backing fabric and then fold over to make a coin purse, a tool wrap, a phone or iPad case, etc. And because the running stitch makes the fabric look beautiful from both sides, there is no need to line it. Win-win!
Slow stitching is a meditative practice that allows me to connect with my materials and the history of textile arts. Each piece I create carries a part of my story, reflected in the choice of fabrics and the rhythm of my stitches. I hope this project brings you the same sense of fulfilment and joy.
For more ideas for using up scrap fabrics or mindful slow stitching, take a look at some of my digital downloads. And don’t forget you can also sign up for my mailing list and receive my free applique tips and techniques PDF and video tutorial.
Happy stitching!


